How to Merge Multiple Archive PST Files in Outlook – Permanent Solutions


In Abstract: Microsoft Outlook is a popular email client. This provides users with the option to store data like emails in PST (Personal Storage Table) files. Thus, manageability is the biggest problem faced by Outlook users. Hence, measures to manage Outlook PST files are often required and adopted by the users. However, it is not easy to find a solution that provides the required output as per the user. So, in such a situation, today we have come up with some great and profitable solutions for you. In this blog, we are going to tell you all the tested ways to merge multiple archive PST files in Outlook. So, let’s move on to the blog to know the process to combine multiple archive files in Outlook.
Table of Contents – Trouble-Free
First of all, let us first know about some benefits of why the user plans to combine two archive files in Outlook. So, let’s go further down and know all the reasons.
Why Merging Archives Beneficial?
Handling multiple archives is difficult. The best course of action is to combine them into a single file. The following are a few benefits of a merging PST File.
- Avoid the worry of unintentionally erasing data.
- Save time by not opening each file again and again.
- Do not send files one by one.
- Maintaining the Efficiency of the Outlook Program
- Access data from several accounts in a single location.
So after knowing all the important reasons. Come, the time has come for us to know all those solutions, with the help of which we can complete the combine multiple archive files in Outlook task. So, let’s go further down.
There are two types of solutions available from the beginning. Then we merge, split, convert, recover, repair, etc the data. So, today we will try manual and automated methods to complete this process. Let’s start to merge multiple Outlook archive files.
Merge Multiple Archive PST Files in Outlook – Manual Approach
There are many such users here who think that the process is completed in a manual way. So, we have given all the human approaches in this part for those users. So, to combine the archive PST file process is divided into two parts which are as follows.
Step 1: Generate a Blank New PST File in MS Outlook
- Open “Microsoft Outlook” on your system.
- Then, under “New Item” click on “More Items >> Outlook Data File”.
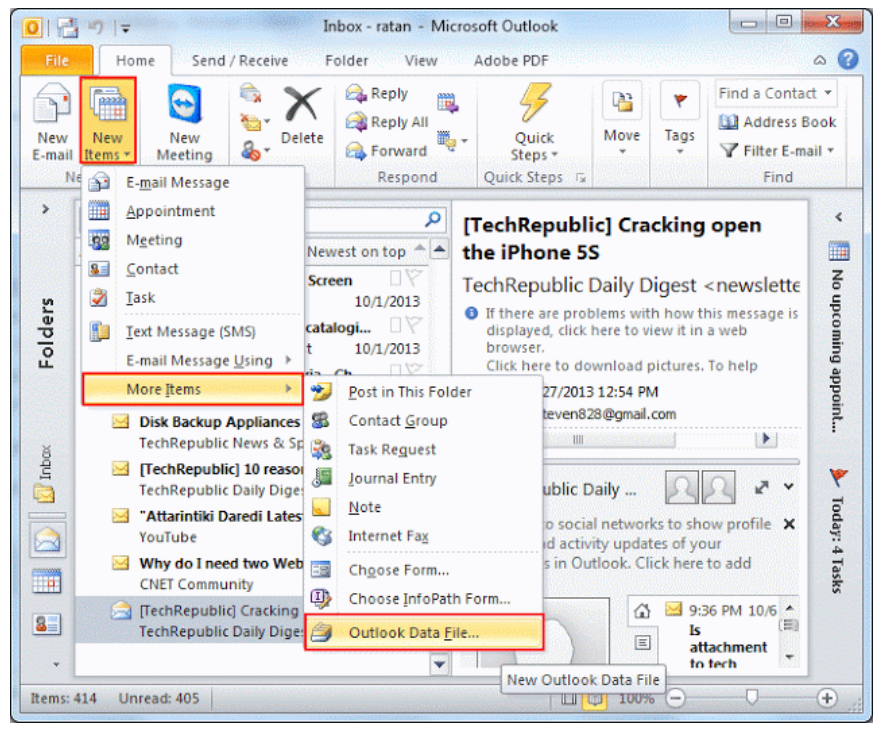
- After that, choose a “Name for the New PST File” and a “Location” to “Save” it.
- Finally, click “OK”.
Step 2: Import All Archive Files Into a New Blank PST File
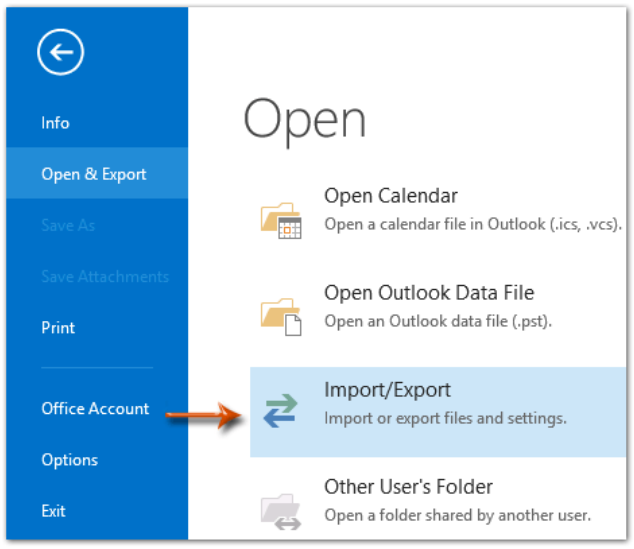
- Open “MS Outlook”.
- Now, click on the “File” tab and choose “Import/Export” from the “Open and Export” menus.
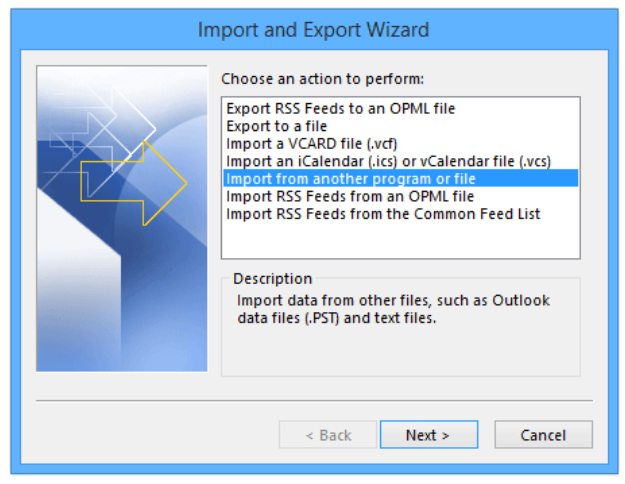
- Next after selecting “Import from Another Program or File“.
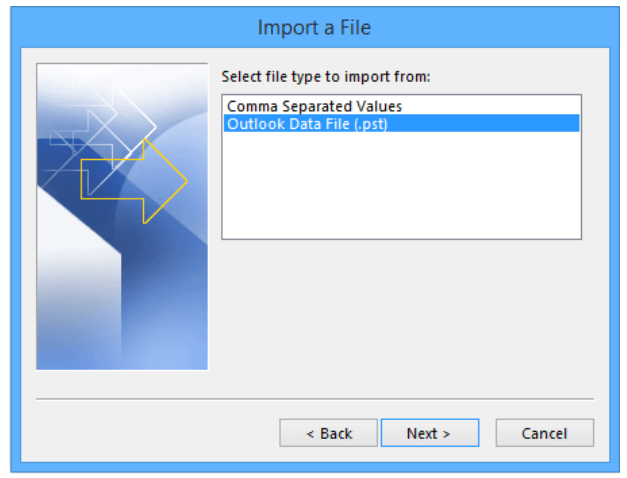
- Then, click “Next” after selecting “Outlook Data File (.pst)“.
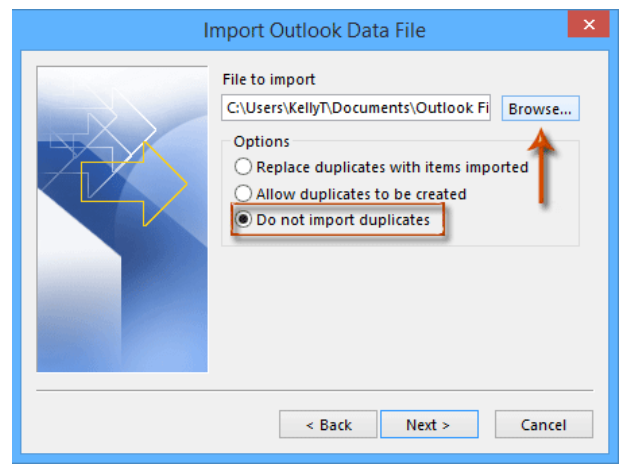
- After selecting the file you want to import from the Browse menu, choose “Don’t Import Duplicates“.
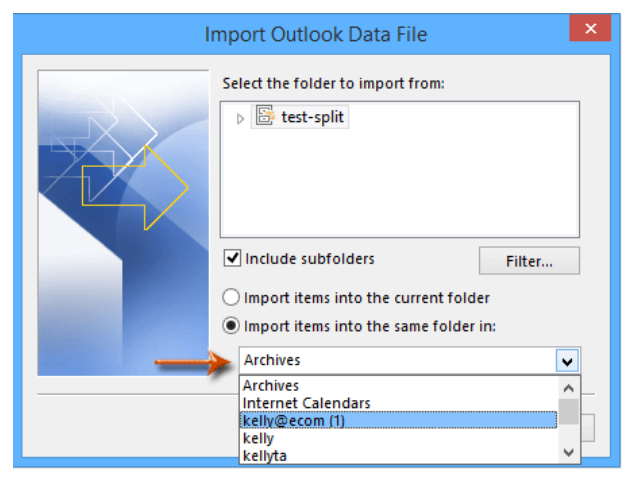
- Select “Import items in the same folder” and “Include subfolders” under the checkboxes.
- After you click “Finish” it is done.
Manual steps would have ended here if you choose this process, it has a lot of limitations. Such as time-consuming, data loose, technical knowledge, and Outlook installations. And so on. So, if you do not want to face all these limitations. For this, try the tested and trusted solutions mentioned below to merge multiple Outlook archive files.
Merge Multiple Archive PST Files in Outlook – Automated Approach
Want to complete this activity in a timely and secure manner? Then, you go with the Professional Outlook PST Merge Tool. This cutting-edge tool provides the ability to merge two or more PST archive files without facing problems with size or data loss. To check the efficacy of the tool, download it for free. For non-professional users, the software provides a user-friendly and straightforward interface.
Combine Two Archive Files in Outlook – Stepwise
- Firstly, download, Install, and Run this Tool on your local system.
- Then click on “Add Files” and “Add Folders“.

- Now choose “Merge” from the menu.

- Next, choose “Merge All Folders” to combine each Outlook PST file.

- At this point, click on “Merge into New PST” to create a new PST file on your PC.

- Finally, press the “Next” key to start combining Outlook.pst files.

Advantages of Utilizing a Tool
- Before merging PST data files, there is an option to remove duplicate items.
- Support for merging Outlook profiles, old PST files, and new PST files
- Provides the ability to find files to locate specific PST files
- Effectively merge network Outlook files, password-protected active Outlook files, and archive PST files
- There is an option to combine multiple PST files in one folder into one.
Time to Close It
In this technical blog, we told you all the tested and trusted solutions to merge multiple archive PST files in Outlook. Also, we have described the possible benefits of merging two archive files in Outlook. Now, there are two types of solutions available which have their own merits and demerits. Now it is your choice which solution you choose to combine two archive files in Outlook.
Get Your Questions Answered: FAQs
Q 1: What is Archive in Outlook?
Ans: Old email, tasks, and calendar items are moved to an archive folder that Outlook Archive (and AutoArchive) keeps in a separate location on your hard drive.
Q 2: What is the Location of the Archive Outlook PST file?
Ans: The location of the archive PST file in drive:\Users\user\Documents\Outlook Files\archive.
Q 3: How to Archive PST Files in Outlook?
Ans: To arcghie all the PST files in MS Oulook. Then, follow below mentions steps:
- Navigate to the “File” tab in Outlook.
- Go to “Options” and then click on “Advanced“.
- Click “AutoArchive Settings” in the “AutoArchive” section.
- Set the preferred frequency and select “AutoArchive” from the menu.
- Determine where you want to save the archived PST file.
- Customize any additional options you choose.
- To save the changes, click “Ok“.